DSAR- Request Types Configuration
DSAR - Request Types Configuration
Data Subject Access Requests can help the user ask for a copy or summary of their data, opt-out or unsubscribe, delete their data, and more. Each of these request types can be configured through the DSAR Configuration screen on the DSA Request page. The default configurations for the domains provide 6 types of requests. Any of these can be chosen or a new request type can be configured at requirement. Instead, any existing request type can also be used with slight modifications.
Using the Pre-defined Request Types
To choose from a pre-defined request type,
Log in to the Data Governance Tool.
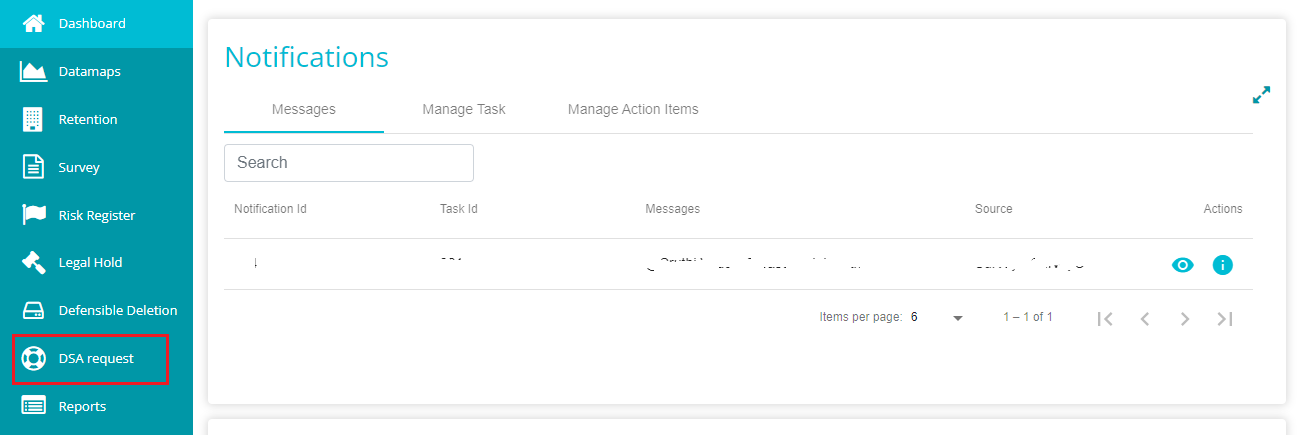
Once logged in, the Data Governance Tool displays the Main Screen.
Navigate to the DSA Request module on the hamburger menu.
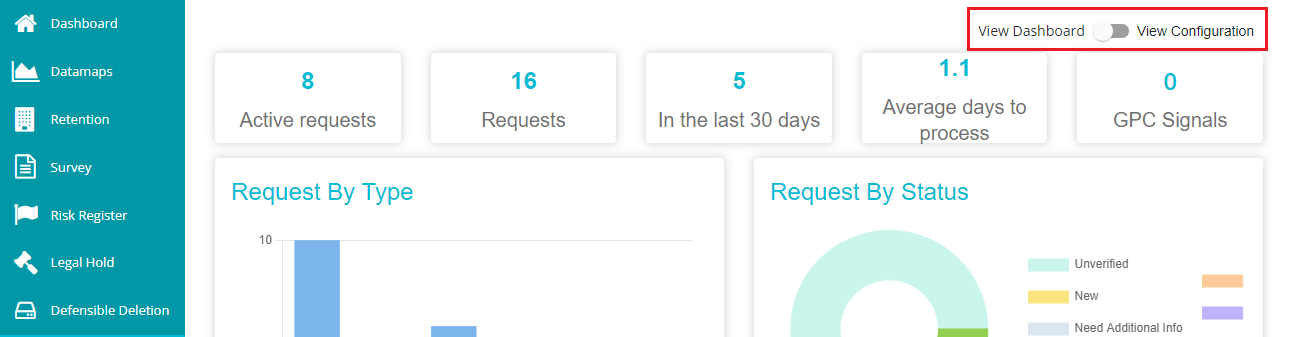
Toggle the 'View Dashboard' button to 'View Configuration' to see the DSAR configurations.
Go to the 'Request Types' tab.
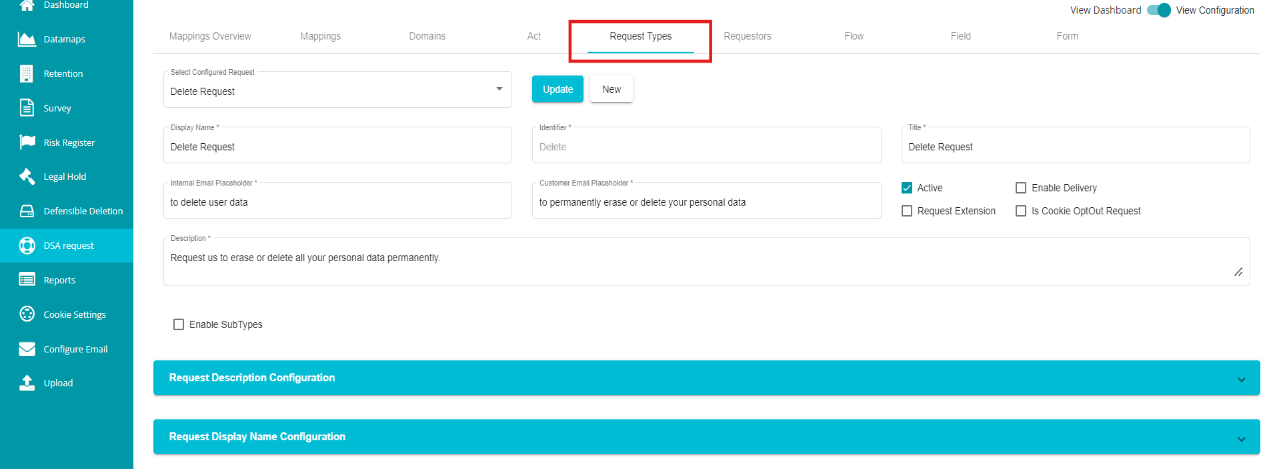
In case you wish to choose from the existing request types,
Click on the 'Select Configured Request' dialog box.
Select any of the pre-defined requests from the drop-down menu.
Click on
 to make the changes.
Likewise, a new request type can be configured from scratch with required customizations.
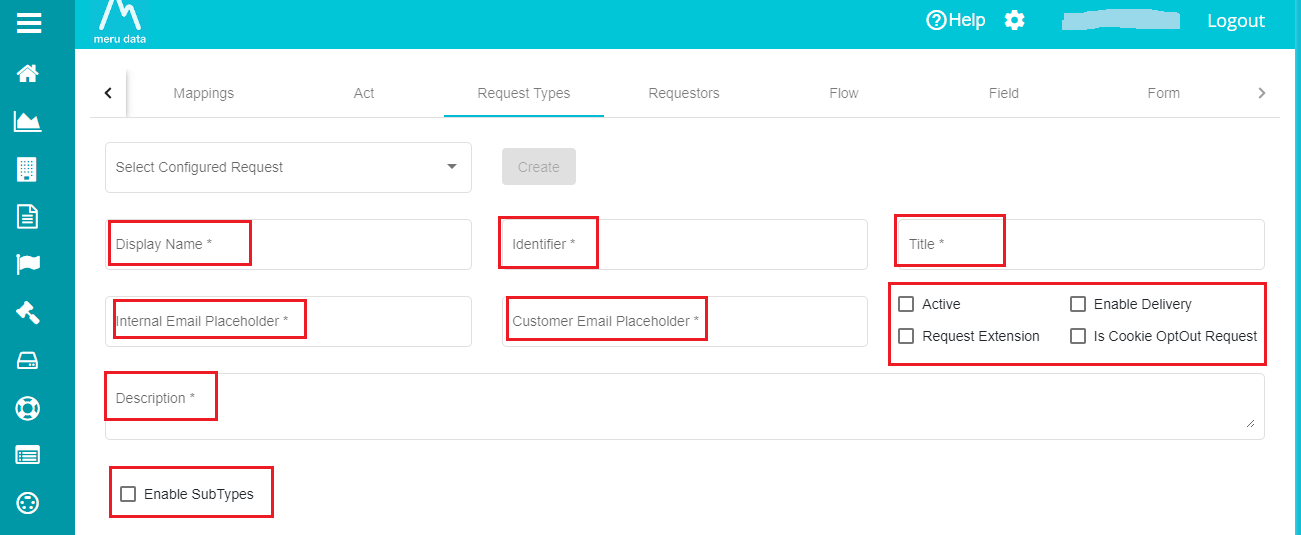
Configuring a New Request Type
If you want to configure a new request type,
Under the 'Request Types' tab, click the
 button present next to the 'Select Configured Act' dialog box.
Type the name in the 'Display Name' dialog box.
Enter the 'Identifier'.
Display Name - the name used for display purposes, through which the request type can be identified. Display name can be defined however you like, irrespective of the letters' case. You can also use special characters if needed.
Identifier - this is used to identify the request type in the backend. An identifier cannot be in capital letters and cannot be a duplicate (shouldn't be matching with any other request type's identifier). Also, you cannot use special characters, symbols, etc.
Note: Display Name and Identifier cannot be left blank when configuring a request type.
- Type the 'Title' for the new request type.
Creating a new Request Type requires the user to define the 'Internal Email Placeholder' and 'Customer Email Placeholder.'
Add the required information in the 'Internal Email Placeholder' dialog box.
Also, type the necessary input in the 'Customer Email Placeholder' dialog box.
Under these options is the 'Description' dialog box which can be configured to display the description of the Request Type on the Welcome Screen. You can add text here or enter NA otherwise.
Enable Delivery - this option should be enabled if you want to automate the delivery phase of the Copy and Summary of Data request types.
Request Extension - this option can be enabled if you want to extend the request processing time in case there is a delay in processing the request within the expected time. Enabling this option will automatically send an extension email to the user when the request processing time is about to complete. You will now have another 45 days to process this request.
Is Cookie OptOut Request - this option can be used to opt out of analyzing and advertising cookies. This option can be enabled for every service request type, letting the user choose if they want to opt-out of such cookies. When this option is configured for a request type, you can see the 'Block advertising and analytical cookies' option present on the request form.
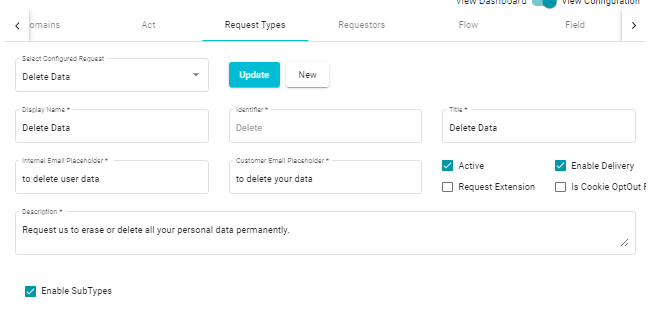
Active - mark the Active option to activate the request configuration being defined.
Enable Sub Types:
A request can have different sub-types within itself. For example, Opt-Out request can have sub-types like Opt-out of Sales, Opt-out of Marketing, etc. In that case, to define multiple sub- request types within a main request type, you can use the Enable Sub Types option.
Checking the Enable Sub Types option displays three options -- sub type, placeholder, and sub type question label.
Sub Types - define the subtypes that you want to define for the selected request type using comma separation.
Placeholder - there are two placeholders: tenant and request type. When selecting the tenant, you are placing the tenant's name with the placeholder on the question label. This is more appropriate for the Requestor type configuration in DSAR. When selecting request type, we are trying to segregate the sub request types using this placeholder, by replacing the request type with it.
Question Label - this is the text that would be displayed to the users, to select from different sub-types within a request when they fill a request form. Usually, the placeholder is included in {} so that it replaces the tenant or request type on the request form.
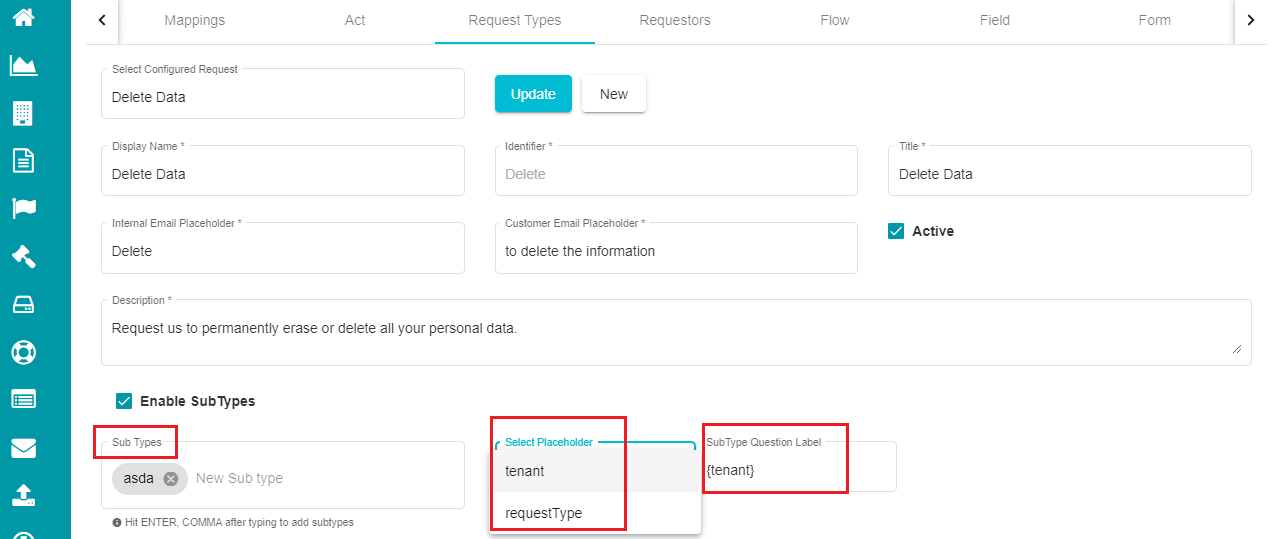
Define 'Sub Types'.
Click on 'Select Placeholder' and select the appropriate option from the drop-down menu.
Similarly, define the 'Sub Type Question Label' .
Note: placeholder is a global term which is replaced by the tenant or request type in the Subtype Question Label. For example, when you are configuring sub-types for an Opt-out request, select 'Request type' as the placeholder. The question label now becomes 'Please select the Opt-out request subtype from here' on the request form. This means that the users will now have to choose the sub-request from the Opt-out request form first and continue to fill in the remaining details.
Now, you need to define the 'Request Summary Configuration' and 'Request Display Name Configuration' for the selected domain. Usually, a single request type (say Delete Request) can be used to configure multiple domains that you create. You can change the description and display names for each domain using the same Request Type.
For Summary Configuration,
Click the
 on the 'Request Summary Configuration' tab.
Click the
 button on the screen.
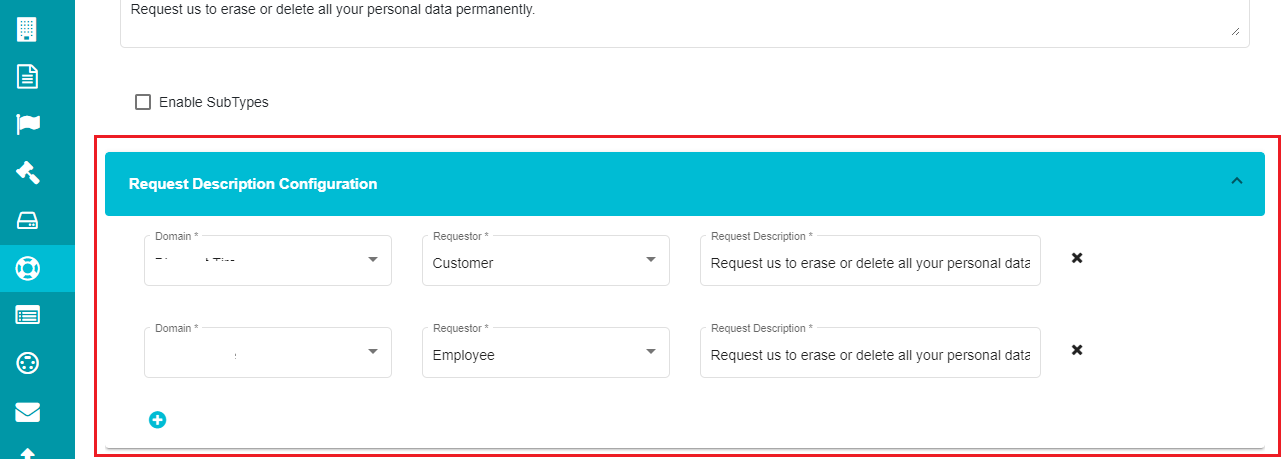
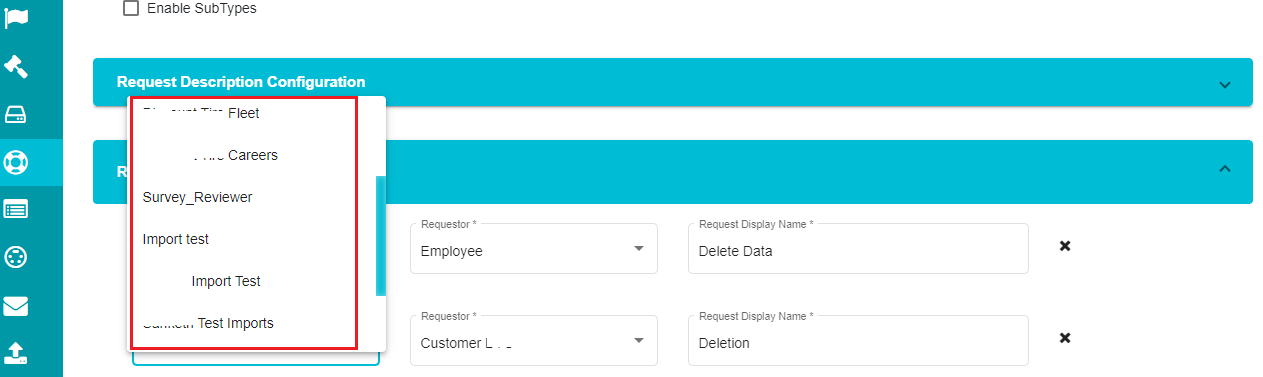
Select the required domain from the drop-down menu under the 'Domain' tab.

Select the requestor type from the 'Requestor' drop-down menu.
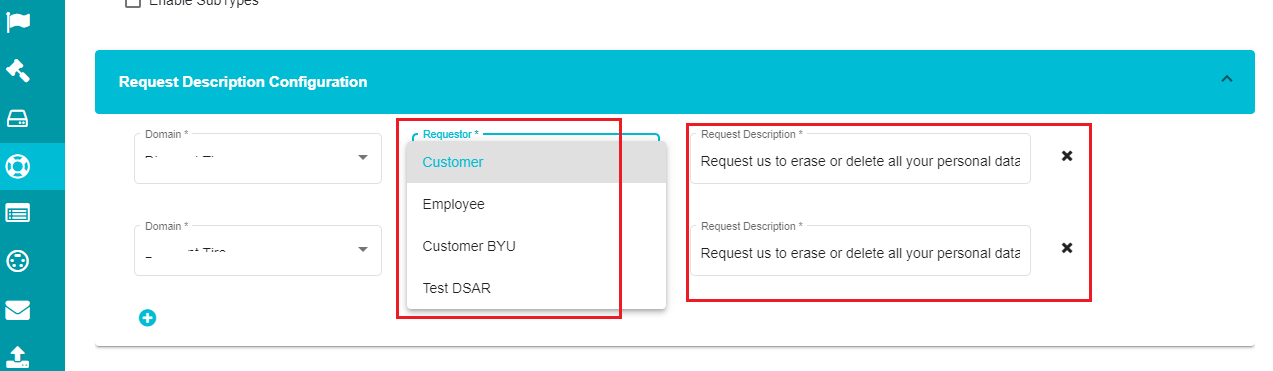
Note: The text to be displayed as the summary for the chosen region on the Welcome Screen should be entered in the Request Summary tab. Using this option, you can define different summaries for different domains configured with the same request types.
- Enter the text in the 'Request Summary' dialog box.
If you wish to differentiate the display name for the Request Type in such cases, you can use the 'Request Display Name Configuration' option.
For the Display Name Configuration,
Click the
on the 'Request Display Name Configuration' tab.Click the
button on the screen.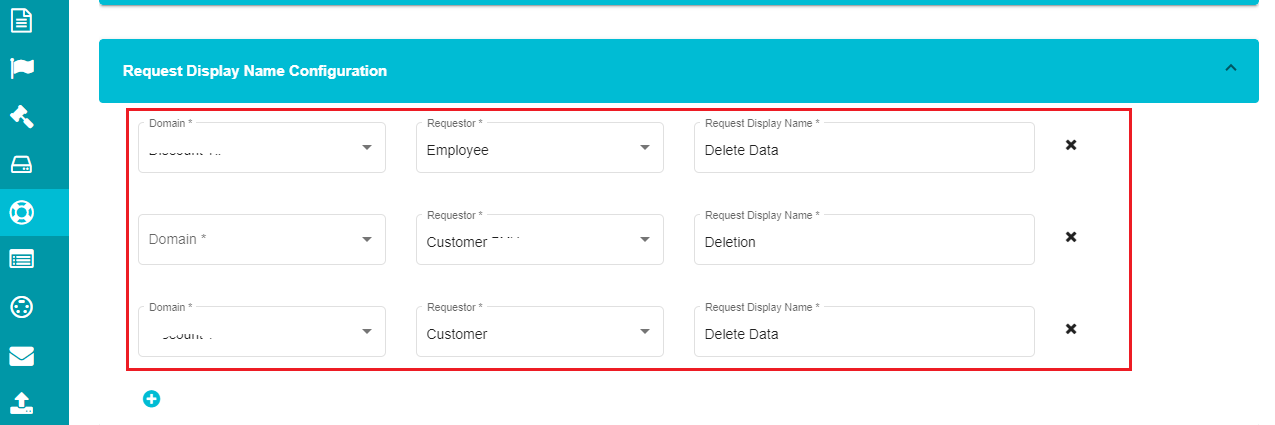
Select the required domain from the drop-down menu under the 'Domain' tab.
Select the required requestor from the 'Requestor' drop-down menu.
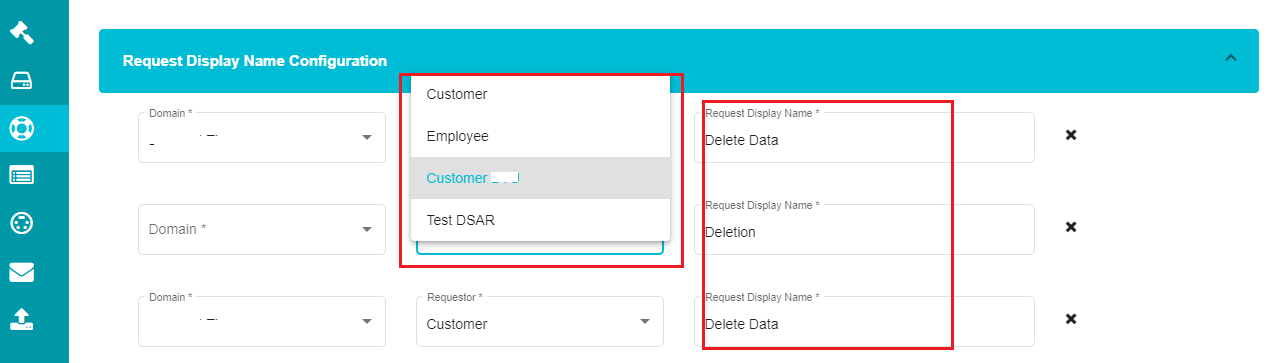
Note: Request Display Name can be used to enter the name for the Request Type that you want to see on the Welcome Screen. This option lets you use the Request Type for multiple tenants with different display names.
• Enter the name in the 'Request Display Name' dialog box.
After defining the Request Summary Configuration and Request Display Name Configuration,
Mark the
 button.
Click the
 button present next to the Select Configured Act dialog box.
A new request type is created, and it must be mapped to the same to the respective tenant.
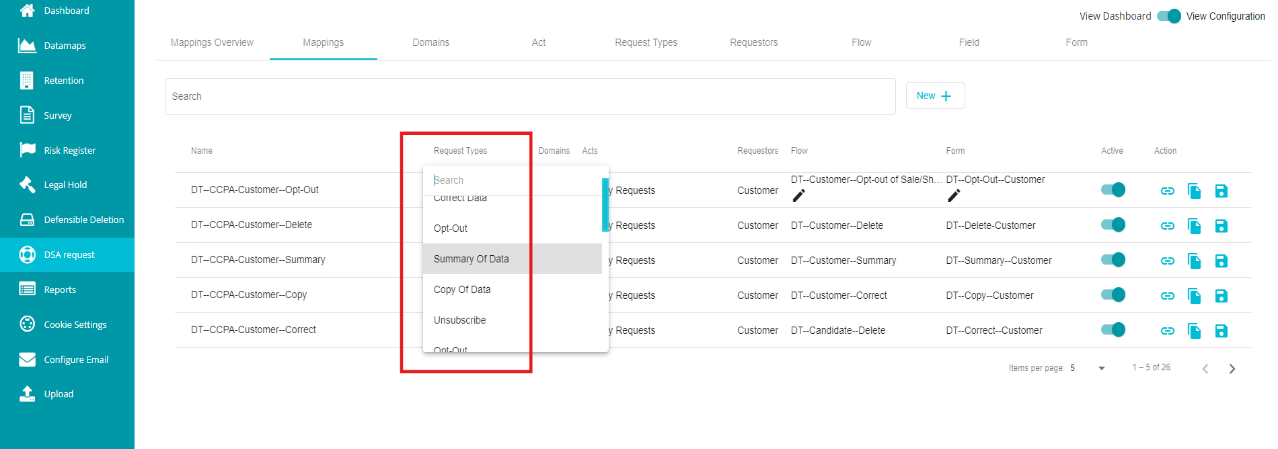
Mapping the Request Type:
For mapping a request type to a tenant,
Go to the DSAR Configuration homepage.
Click the 'Mappings' Tab.
Click the drop-down menu under the 'Request Types' tab.
You can find the created request type in the drop-down menu along with the pre-defined ones.
Select the new request type from the menu.
Check the Active
 icon after making the selection.
Tap the Save
 icon.
icon.